Moving subscribers away from Feedburner and into Mailchimp
Click here if you would rather download and print this guide
(however, there will be links to videos in the guide)
If you are a Feedburner user you probably have heard the news that Google is placing Feedburner into “maintenance mode” starting sometime July 2021. What the heck does “maintenance mode” mean? You may have seen this message when you logged into Feedburner or you were sent an email.
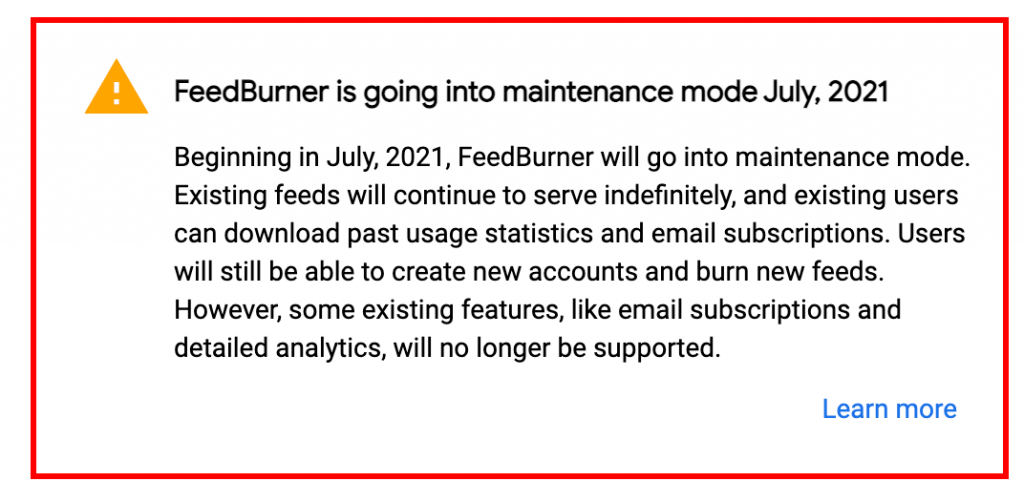
Upcoming changes to FeedBurner in July 2021. Read the full announcement from Google >
In summary, it means new subscribers will not be able to signup to receive your blog posts via email. It means if you are a Blogger user, the FollowByEmail widget will no longer work, and your automated emails to your subscribers will not be supported.
In other words, it is time to move to a new service.
Sounds daunting? I know. But don’t worry, I’ve got you covered in the step-by-step guide that has been updated for this Google announcement.
What email subscriber service should you move to?
You can move to several different email marketing providers. There are many out there: Constant Contact, MailerLite, ConvertKit, ActiveCampaign and so many more. However, if you want similar (and better) features to what you have in Feedburner AND for an affordable price, FREE (see below), then the best email marketing service to work with is Mailchimp* and this is the service I use for many of my clients and in this tutorial.
Mailchimp Free Plan includes up to 2,000 contacts, with 10,000 sends per month and a daily limit of 2,000.
If you decide after reading this guide that you do not want to make this transition yourself, I can help. Since I am familiar with Mailchimp, moving accounts from Feedburner to Mailchimp is something I can do pretty quickly. If you prefer to hire me to do all of this for you, fill out this form. I’m happy to help.
Step by Step Guide to moving subscribers out of Feedburner and into Mailchimp
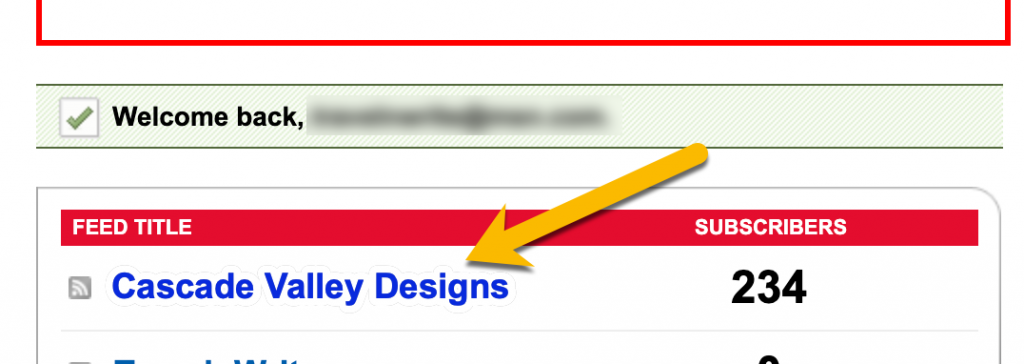
#1. Open your Feedburner account and click on your Feed Title which is right next to the number of subscribers you have.
#2. Locate your subscribers in Feedburner.
You think this would be easy but it takes some digging. You need to click on the Publicize tab, then Email Subscriptions, then Subscription Management……
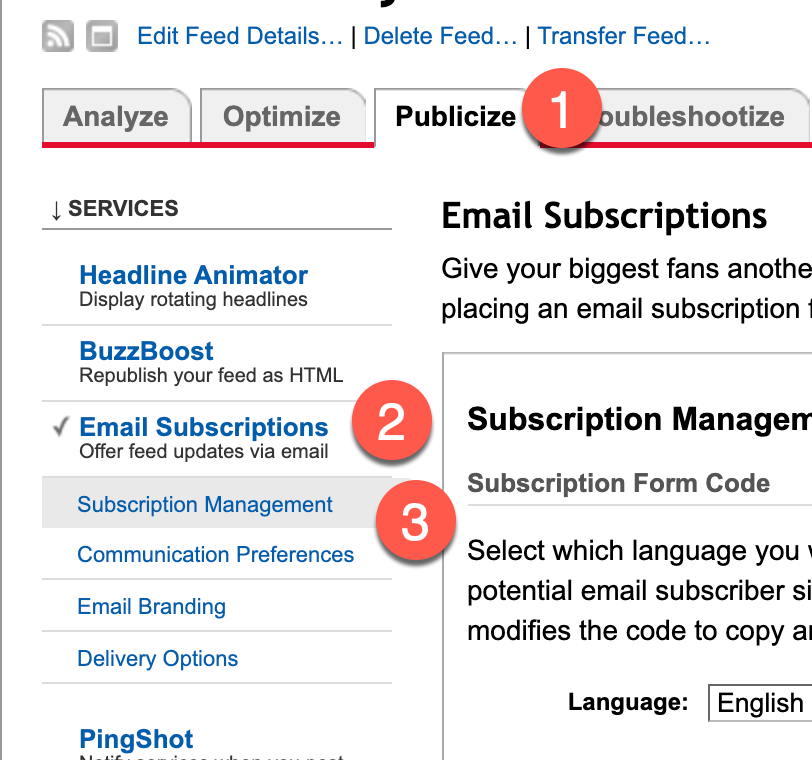
…..then scroll down and click on View Subscriber Details below Total Subscribers

Once opened click on CSV next to Export

#3. Open your subscriber list and delete any unverified email addresses
Next, open the CSV file you exported in Excel, Google Sheets or Numbers (Apple). It doesn’t matter. As long as you can edit the file. Then sort the 3rd column, “Status”, descending from Z to A. Then delete any rows that show “Pending Verification” in the Status column.
Why delete these addresses? These are well-intentioned subscribers who never verified their addresses. So they never received your blog posts via email, to begin with. Now to be fair, Mailchimp does not require double opt-in anymore so you could move all the addresses over, but the unverified may be confused as to why they are suddenly receiving emails from you. They can always unsubscribe though, so you can decide to use them all.
Finally, download the edited file back to your computer as a CSV file.
Below is a short video on how I sorted and deleted the unverified emails from the list. Email addresses have been blacked out in this video.
Now you are ready to move your subscribers to Mailchimp.
#4 Start your Mailchimp* account if you don’t already have one
You will start off with a free account. Fill out all the information Mailchimp asks (full setup guide coming soon).
#5 Upload your Feedburner subscriber list to your Mailchimp account
Once your account is activated, click on Audience

On the next screen, in the upper right-hand corner select Manage Audience, then Import Contacts.
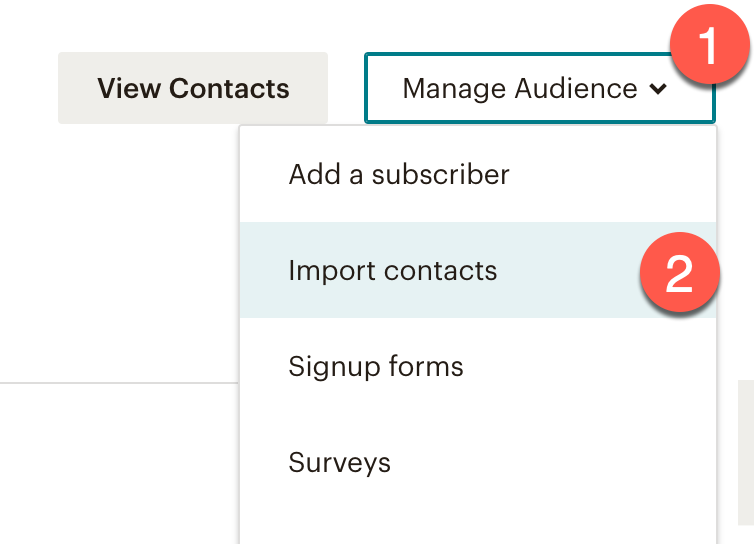
Then select Upload file on How would you like to import your contacts page

Then find the CSV file you cleaned up and downloaded in Step 3
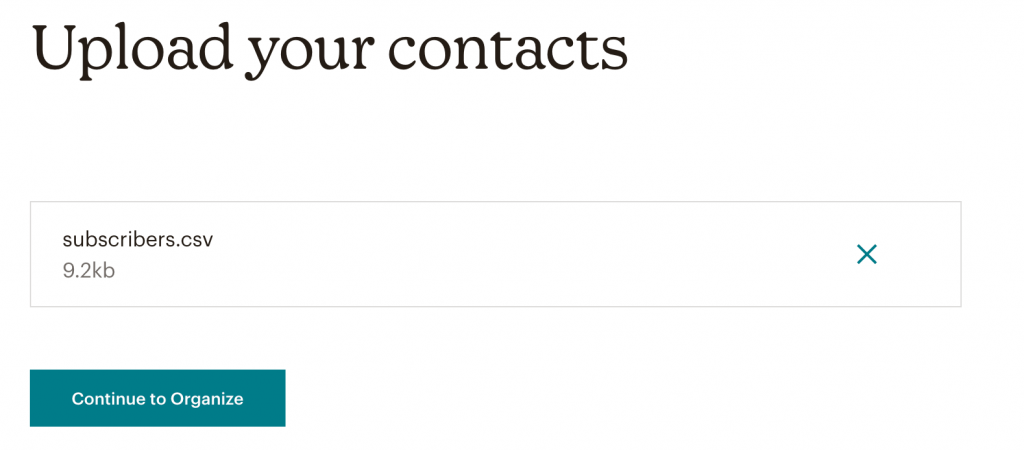
Then you select which columns of information you want to move into your new list. You really only need the first column of email addresses, but in this video, I show you how to assign the date column to Opt-in time and not import the Subscribe Status column. Email addresses have been blurred out in this video.
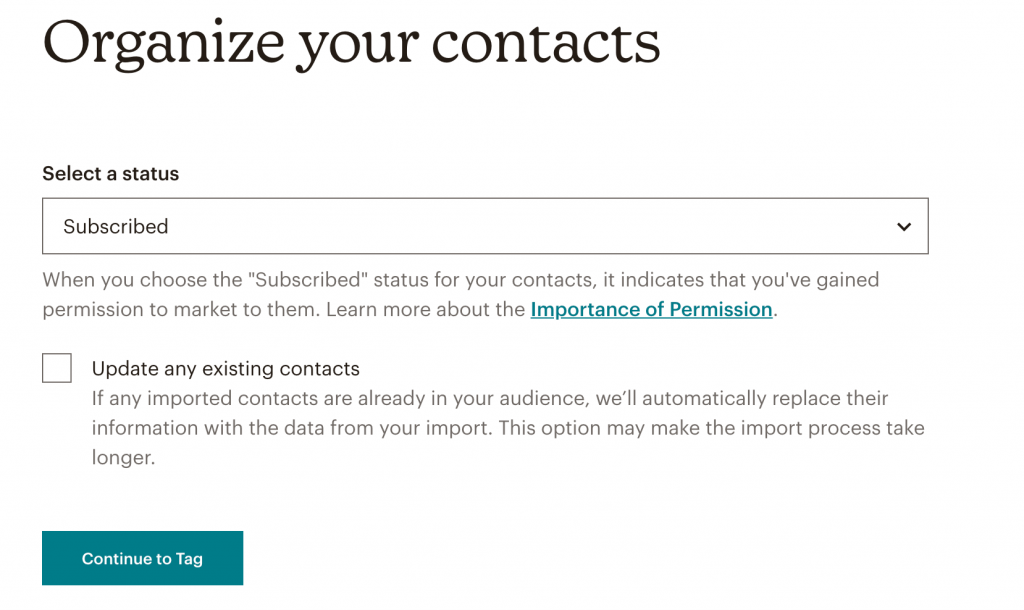
On the next screen, select Subscribed on the status dropdown and then click “Continue to Tag
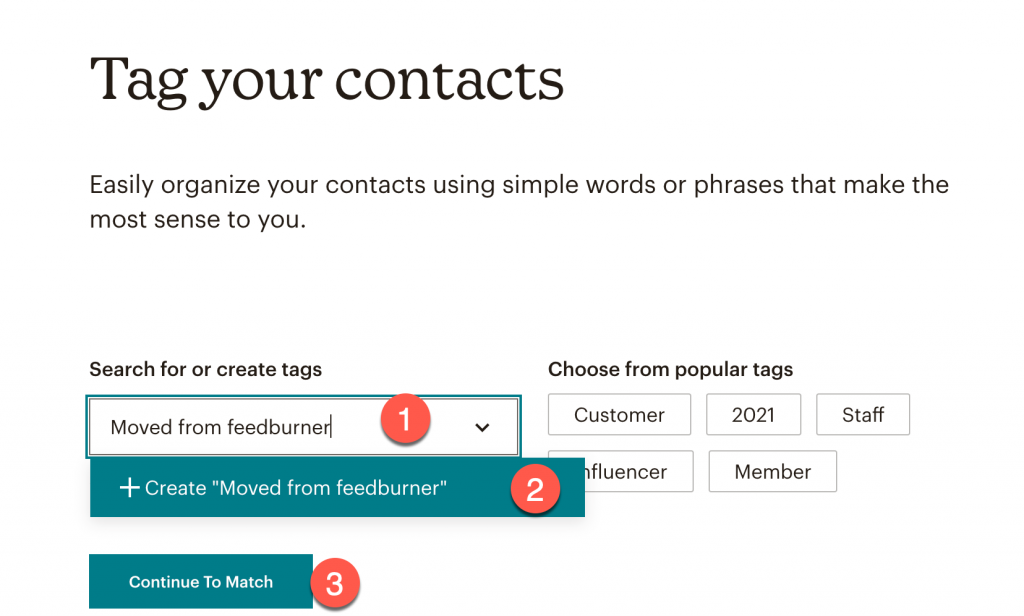
You can decide to Tag your contacts on this next screen. I suggest you do that so you can always look back as your subscriber list builds in Mailchimp and know which addresses were imported from Feedburner (and send to them specifically if you need to). Type in any tag you want. I labeled these as “Moved from feedburner”. After you type in the tag, select “+Create…” underneath, then click the “Continue To Match” button.
Congratulations! You are now done importing your contacts.
Next, you will learn how to add a signup form from Mailchimp to your website.
#6 Replace your Feedburner subscribe form with a Mailchimp subscribe form
Select Audience from the left menu and then Signup Forms
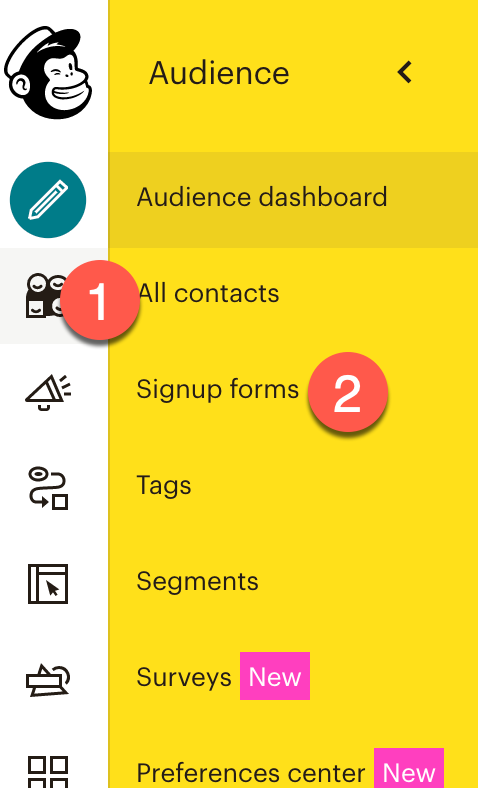
Then select Embedded Form

You can select from several different form styles but for this tutorial, we will stick with the first style, The Classic. You can change the title of the form or not include a title at all. It’s best just to show only required fields (usually the Email Address field) but you can decide if you want all fields. You can keep the 3 boxes on the left checked. You probably don’t have group interest groups if you are just getting started (that’s explained in a more advanced tutorial, coming soon).
Lastly copy the code in the copy/paste section.
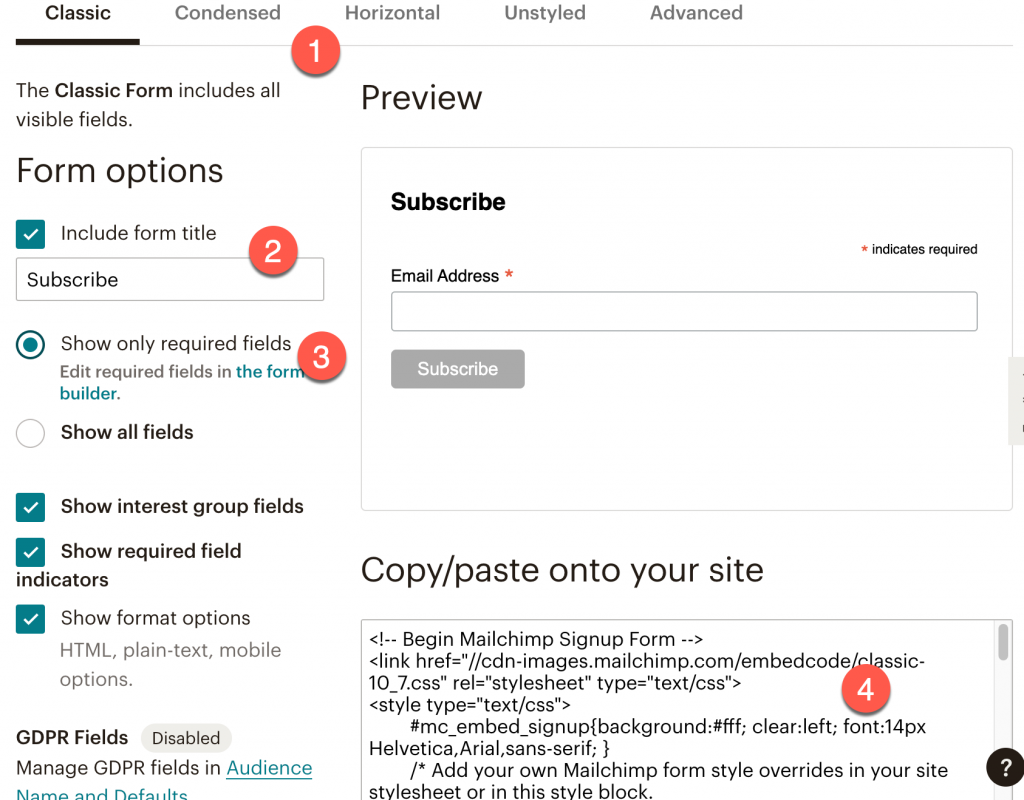
Next, edit your website and replace the Feedburner code on your website. You may have to delete the widget and add an HTML widget or if you can replace the subscribe code already on your site that’s even better.
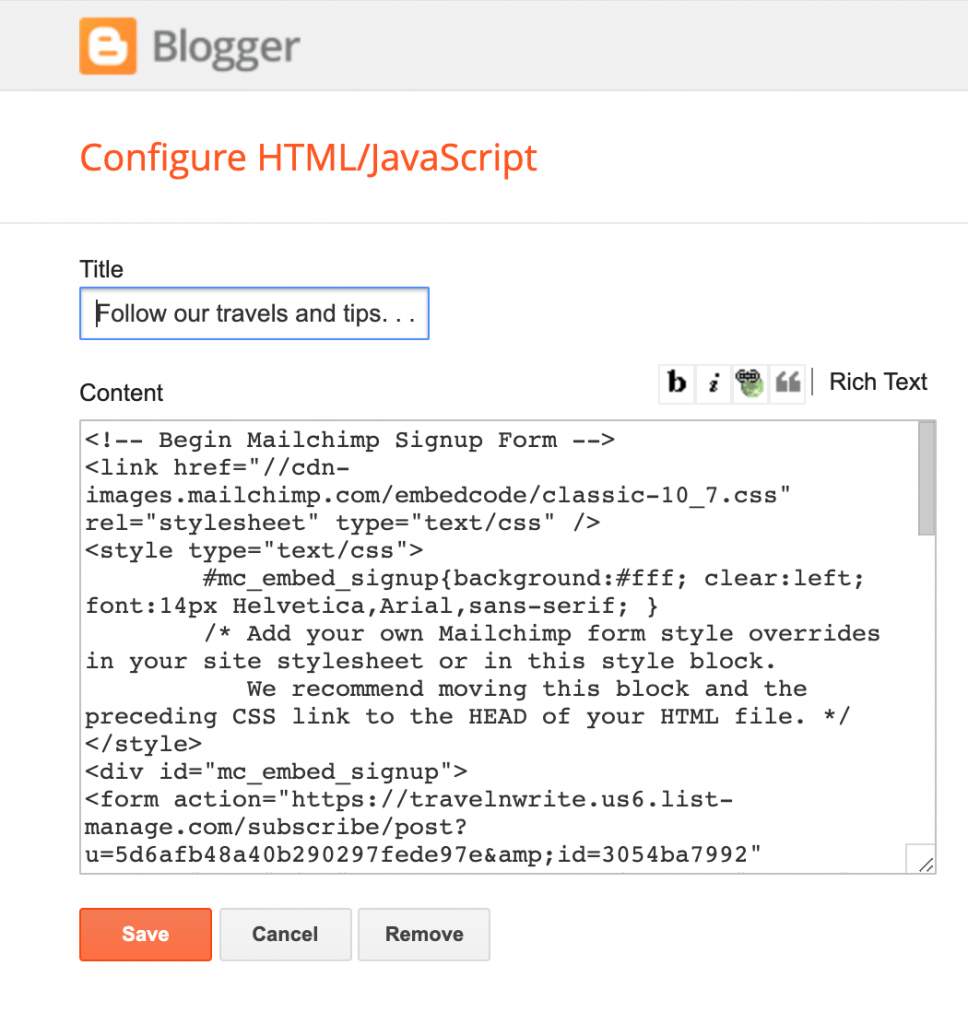
This is an example of a HTML widget on a Blogger site where the Mailchimp subscribe form can be pasted.
Nice job! Now that you have the new subscribe form on your website, let’s set up the automated email that is sent to your subscribers after you publish a post.
#7 Setup the Automatic Blog Email in Mailchimp
First, start by moving away from the Audience part of Mailchimp and into Campaigns (that is Mailchimp’s term for an Email blast)
UPDATE: Mailchimp has made this part very difficult to find, so click on this link and it should take you where you need to go IF you are already logged into Mailchimp.
Thank you to post readers Jay & Stanley for letting me know what I originally wrote on this part was no longer available on Mailchimp.
Next, you should see something similar to this popup

Now you will need to find the feed URL of your blog.
Return to your Feedburner account, look for the RSS icon at the top of your account under the feed main title, and click on that.
![]()
Then copy the URL in the address bar
![]()
Go back to Mailchimp and paste the feed URL in the first field. Then select when you want the email to send. Usually, you will want to send the email Every day. The email will only send IF there is a new post 24 hours prior. Then select the time you want the email to send. If the time zone was not set up to match the time zone you are in go to your account settings to change it. (This will be included in a more advanced Mailchimp setup tutorial, coming soon). Then select “Resize RSS feed images to fit the template.”
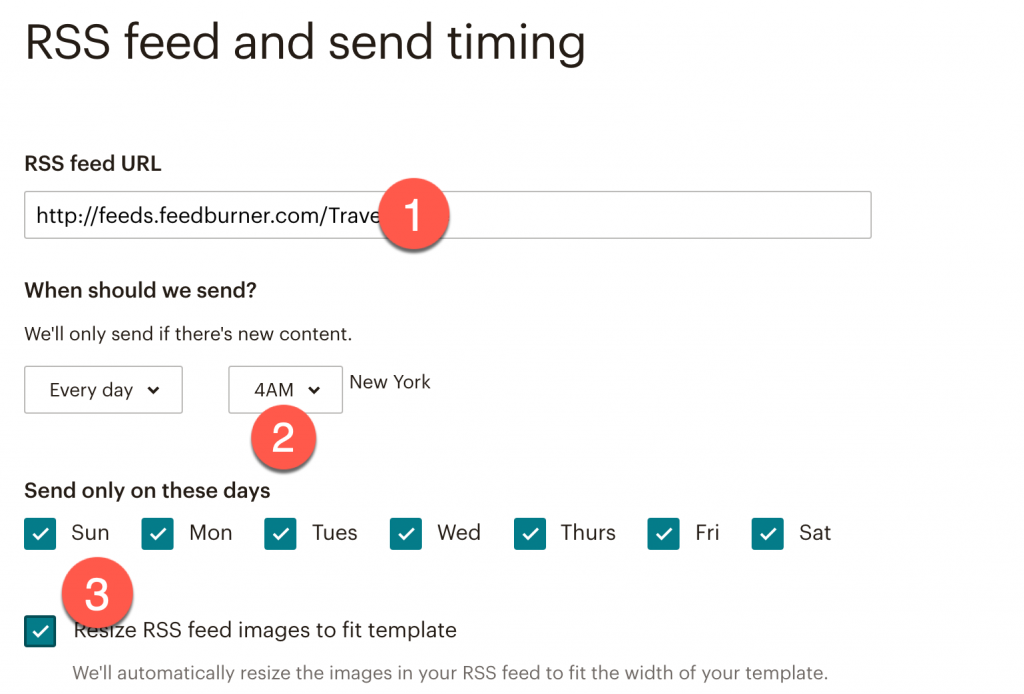
Then go to the next page (Recipients) and select who you want to send the email to – your Entire audience. (An in-depth explanation of segments, tags, and groups will be explained in a more advanced Mailchimp setup tutorial, coming soon).

Next, you are on the Setup page of the Campaign flow.
Your Campaign name is for your record in the campaign list. Your subscribers don’t see this.
In the Email subject field, replace what is in this field with this code *|RSSITEM:TITLE|*
This makes sure that the title of your blog post is pulled into the subject line automatically.
The Preview text is what appears in some email programs as a preview before the email is opened so you want some text there, like “Read the latest update from the Travel blog”. Make sure your From name and email address is accurate then select Next >.
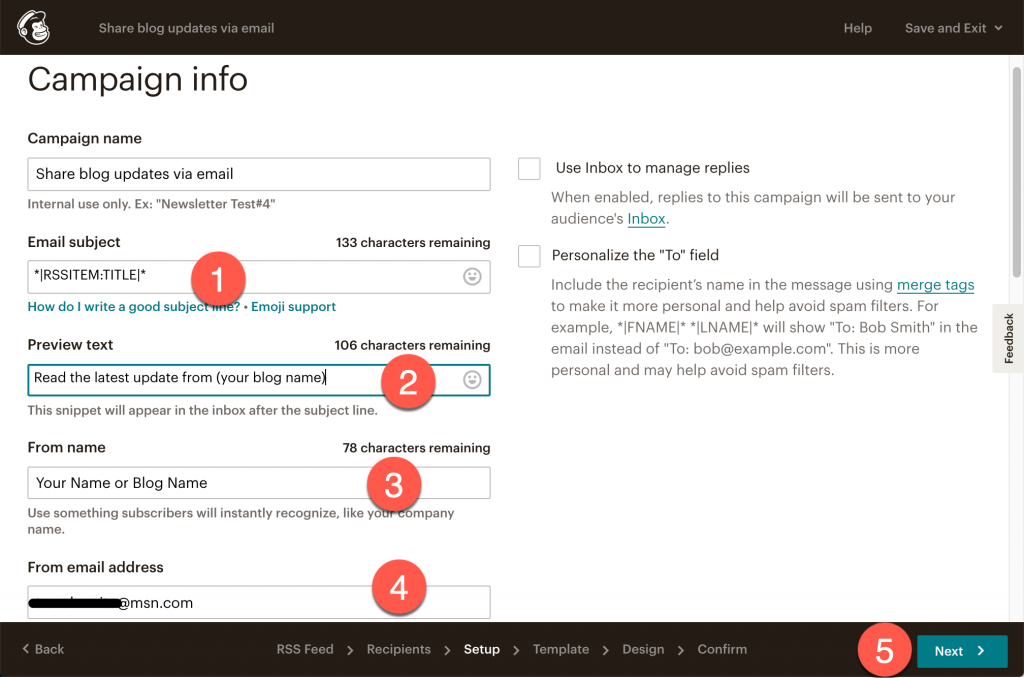
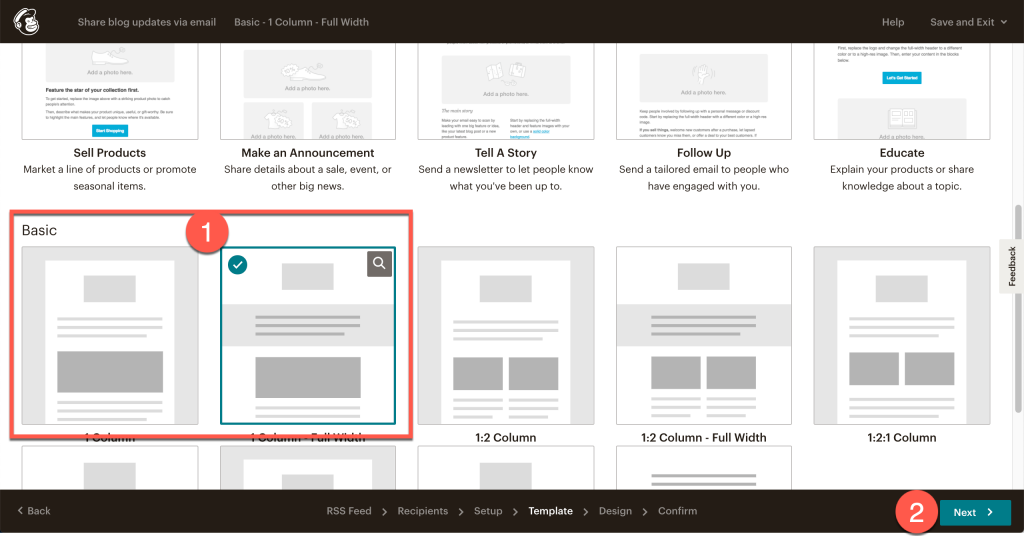
On the Template page, I suggest selecting one of the first 2 styles under Basic. These are the best frameworks for getting started with a simple email layout. Once you select one of these click Next >.
Now is the fun part! On the Design page, you will change your logo, add the feed code and update the social links.
Here is a video on how to complete this step:
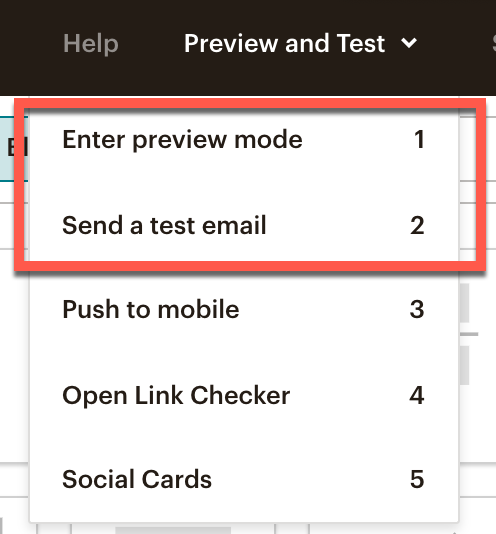
Click Next >
On the Confirm page, there is a checklist to make sure everything is set up correctly. Review this and make any edits as needed. Most of the time no changes need to be made at this point.
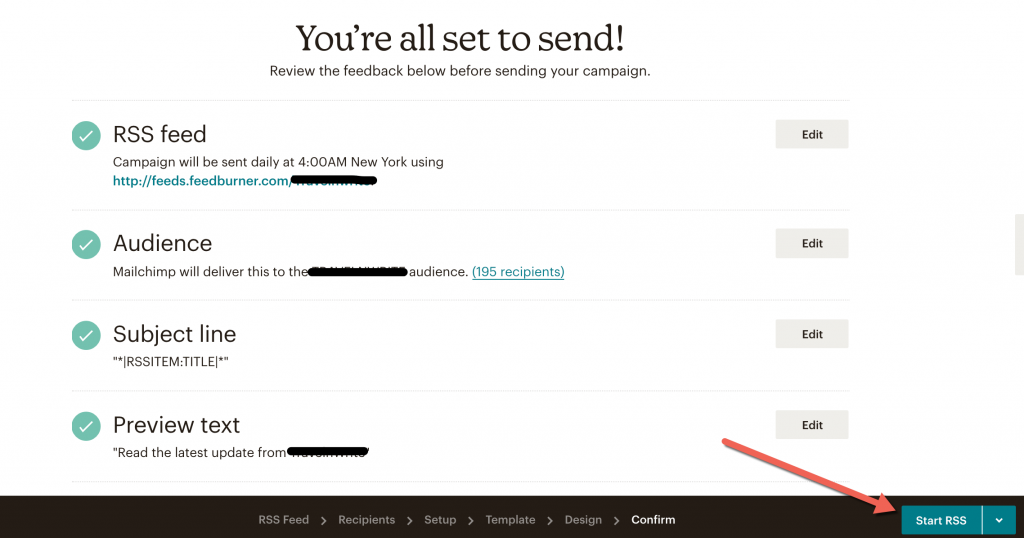
Great job! You are almost finished.
Now let’s close things up over at your Feedburner account.
#8 Stopping Emails from sending in Feedburner
Google has not provided an exact date when they are shutting down some of the features in Feedburner. So it is a good idea to manually turn off the auto-emails being sent from Feedburner so your subscribers do not receive blog updates from both services during this transition. Here is how that is done.
Log into your Feedburner account and click on the Publicize tab.
Click Email Subscriptions > Delivery Options, then click Deactivate.
This stops emails from being sent from Feedburner until Google stops this feature.
IMPORTANT: Do NOT shut down your Feedburner account. Your blog feed url is still being pulled through Feedburner and you have pasted that into Mailchimp. Google is keeping this part going.

Nice job!
If you read this far, and you still have questions please ask in the comments.
If this tutorial seems too daunting to do on your own, I understand. Since I am familiar with Mailchimp, moving accounts from Feedburner to Mailchimp is something I can do pretty quickly. If you prefer to hire me to do all of this for you, fill out this form I’m happy to help.
*This is my referral link to Mailchimp. If someday you upgrade your account to a paid plan then we both receive a credit on our accounts. You can read more about how their Referral Program works here.


Thank you, this was exactly what I needed. It also didn’t take me as long as I thought. I have been putting off doing this but now it’s done I feel relieved. Thanks again
So happy to hear it helped and it didn’t take long!
THANK YOU!!! This was immensely helpful and I believe I am now all set up!
That makes me so happy to hear this tutorial was helpful to you. Thanks for taking the time to comment.
I did it! And I didn’t even have to have my kids help me. Thank you for a great tutorial.
That’s funny. Nice job getting it done yourself!
This was outstanding! If I need more advance work in the future I will definitely contact you.
Thank you, thank you!!! I put this off for so long and probably never would have updated it without your instructions.
I know it seems like a daunting task. Good job on getting it done. Glad I could help.
Hi. I was following your tutorial, but when I get to Step 7 I don’t see the options you have. I get Design Regular Email, Landing Page or Embedded Form. Do you know if the options have been changed?
Jay, my apologies for not seeing your question sooner. You are correct. This has been changed in Mailchimp. They seem to have really hidden this type of campaign, but luckily there is a direct link to take you right where you need to go to set up the RSS email campaign: https://us5.admin.mailchimp.com/campaigns/#/create-campaign/explore/rss
I have updated this post to reflect this change. Thanks again for letting me know.
Hi
Thanks for your reply and for updating the guide.
I was going to switch to Mailchimp from Feedburner, but Mailchimp (and I think other similar services) all want you to include your postal address in every email now. I understand why this is, but my emails are just blog updates, not marketing communications. If there isn’t a way around this, then I may have to stick with Feedburner for existing subscribers, but I assume I won’t be able to add any new ones.